Best Way For OneNote wrap text around image | Tech Bulletin

Suppose you are a student, professional, or just looking for a better way to organize your thoughts. In that case, this guide will help you create visually stunning content using the OneNote wrap-text-around image feature. OneNote is a well-known note-taking and planning program that enables users to make notes and presentations that are attractive and well-organized graphically. 73% of Microsoft OneNote customers are in the United States. One feature that makes OneNote particularly useful is its ability to wrap text around images, allowing users to create dynamic and engaging content.
5 Best Ways For OneNote wrap text around image
Some users often need help wrapping text around images, making notes appear cluttered and difficult to read. Here are the five best ways to wrap text around an image in OneNote.
1. Choose the Right Text Wrapping Option:
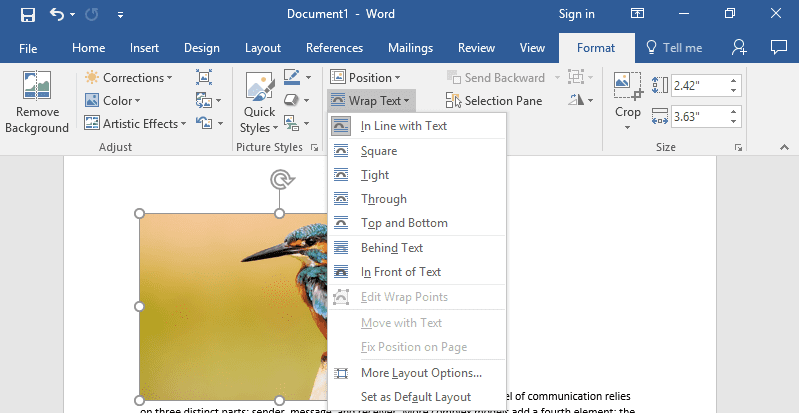
Selecting the appropriate text-wrapping option in OneNote when wrapping text around images is essential. OneNote provides several options, such as “Square,” “Tight,” or “Through,” which can significantly modify how your content appears. Ensure that your text and images look fantastic by learning to use these choices and selecting the best one based on your image and page layout.
2. Adjusting Margins:
To wrap text around a picture in OneNote, adjust the margins. You can do it by right-clicking on the image and selecting “Size and Position. You can then alter the margin settings to separate the image from the surrounding text.
3. Inserting Tables:
Inserting a table in OneNote can separate text and images. You can insert a table and add your text and images within the individual cells, ensuring your notes are well-organized and easy to read.
4. Using Shapes:
OneNote also allows you to insert shapes, such as rectangles and ovals, and you can use that to wrap text around a picture. Insert the form, place it over the image, and adjust the text wrap settings.
5. Using Image Editing Tools:
If you want more advanced text wrap options, use image editing tools outside of OneNote to create the desired effect. Once you’ve edited the image, insert it into your OneNote page and adjust the text wrap settings.
How to Wrap Text Around Image in Onenote Microsoft?
To use the OneNote wrap text around image feature, follow these steps:
- Insert the image you want to wrap text around into your OneNote page by selecting “Insert” from the top menu, clicking “Pictures,” and selecting the image you want to insert.
- Click on the image to select it.
- Select the “Text Wrapping” option from the context menu that appears when you right-click on the image.
- Choose the type of text wrap you want to apply, such as square or tight wrap.
- The text will automatically wrap around the image according to your chosen wrap style.
- If you want to adjust the wrap settings further, select “Size and Position” from the context menu and adjust the margins.
- You can also use shapes or tables to wrap text around images in OneNote by placing them over the image and adjusting the text wrap settings.
Tips And Tricks To Wrap Text In OneNote
Wrapping text around images in OneNote can help create visually appealing and easy-to-read notes. Here are some tips and tricks to make the most of this feature:
1. Choose the Right Text Wrap Style:
OneNote offers various text wrap styles: square, tight, through, and top and bottom. Choose the one that works best for the image and the text.
2. Use Multiple Images:
Consider using multiple images on a page to break up the text and make it more interesting. Use different text wrap styles to keep the page looking organized.
3. Adjust the Image Size:
The size of the image will impact how the text wraps around it. Ensure the image size is appropriate and only takes up a little space on the page.
4. Experiment with Margins:
Adjusting the margins is an easy and compatible way to create space between the image and the surrounding text. Play around with the margin settings until you find the perfect balance.
5. Keep it Simple:
While adding multiple images and shapes to a page can be tempting, doing just what is necessary is essential. Keep the page clean and organized.
Also Read: How to Recall a Text Message on Android?
Conclusion
In conclusion, the OneNote wrap text around image feature can be a valuable and attractive way to create notes. You can make well-organized and easy-to-read notes that effectively convey your message by following the tips and tricks outlined in this article, such as choosing the right text wrap style, using multiple images, adjusting margins, and keeping things simple. Using tables and shapes to wrap text around pictures in OneNote can provide additional options and choices for structuring your notes.
FAQs
Q. Are there any tips for making text wrap-around images look good in OneNote?
Some tips for making text wrap-around images look good in OneNote include choosing the right text wrap style, using multiple photos, adjusting the image size, using shapes, and experimenting with margins.
Q. Can the text be edited after wrapping around an image in OneNote?
Yes, you can edit the text after wrapping around an image in OneNote. Select the text and make the desired changes.
Q. How do I wrap text around an image in OneNote?
First, insert the image into your page to wrap text around an image in OneNote. Then, select the image and choose the “Text Wrapping” option from the context menu. Choose the type of text wrap you want to apply, such as square or tight wrap.


